


Shower Repair Aftercare: Natural Hacks to Maintain Your Bathroom 

Share this:

Author: Mark Studdert

Your bathroom has just received a professional shower leak repair using high-quality products designed to prevent water from escaping and protect the surrounding area.

But what happens next?

Many homeowners return to their usual cleaning habits and reach for strong chemical products, believing they will provide a deeper clean. On average, Australians spend roughly $60–$70 per person each year on strong chemical bathroom and shower cleaners they believe deliver a deeper, more hygienic clean.

However, stronger does not always mean better. Some cleaning products may irritate the skin or respiratory system when used incorrectly, while harsh chemicals and abrasive tools may gradually affect grout, sealants, and newly repaired surfaces. 

Proper shower repair aftercare begins with allowing the repaired area to cure, followed by gentle, regular cleaning to keep it protected for years to come.

Post-Care After Your Shower Repair Service

The first 48 hours are important. During this period, you must allow the SealRight™ epoxy to cure and bond properly.

After your shower repair service:

  • Do not use the shower for the first 48 hours.
  • Follow any additional instructions provided by your technician.
  • Use mild, non-abrasive cleaning products.
  • Avoid bleach, harsh chemicals, and abrasive scrubbers.
  • Remove puddles and standing water after showering.
  • Keep the bathroom well ventilated.
  • Check the perimeter seal every few months for lifting or cracking.

Giving the SealRight™ epoxy enough time to cure helps the new perimeter seal form a strong and lasting bond. You can learn more about how long professional shower waterproofing can last when properly maintained. 

Understanding Your Shower Repair Warranty

Our SealRight™ epoxy seal is backed by a 25-year Product Warranty on the perimeter seal of your shower.

It is important to understand that the warranty covers the SealRight™ perimeter seal. It does not cover:

  • Plumbing-related issues
  • Damage or movement caused by the building
  • Problems unrelated to the repaired perimeter seal

Regular cleaning, ventilation and proper shower maintenance can help protect the repaired area and keep it performing as intended.

Learn more about our warranty terms and conditions.

Long-Term Natural Shower Maintenance

Once the repaired area has fully cured, regular cleaning will help prevent soap scum, grime, mould and mineral deposits from building up.

The best approach is to clean gently and consistently. A soft microfibre cloth, non-abrasive sponge and mild cleaner are usually enough to maintain the shower floor, tiles and perimeter.

Natural cleaning products can also be used, including properly diluted white vinegar. However, there is an important difference between pure vinegar and diluted vinegar. 

Pure Vinegar vs Diluted Vinegar

Pure or undiluted vinegar is highly acidic and should not be poured directly onto your repaired shower area.

Diluted vinegar is gentler and may be used for routine cleaning when mixed with warm water. A simple mixture of equal parts white vinegar and warm water can help remove light grime and mineral deposits from suitable bathroom surfaces.

When using diluted vinegar:

  • Never apply undiluted vinegar directly to the shower seal.
  • Mix it with water before use.
  • Do not allow it to sit on the repaired area for a long period.
  • Rinse the surface with clean water afterwards.
  • Test it on a small, discreet area first.
  • Never mix vinegar with bleach or another chemical cleaner.

Mixing bleach with vinegar, ammonia or other cleaners can release dangerous fumes. NSW Health advises never mixing household bleach with ammonia or any other cleaner and recommends keeping the area well ventilated.

For everyday care of the repaired perimeter, a mild, pH-neutral cleaner remains the best option.

Natural Ways to Keep Your Bathroom Clean
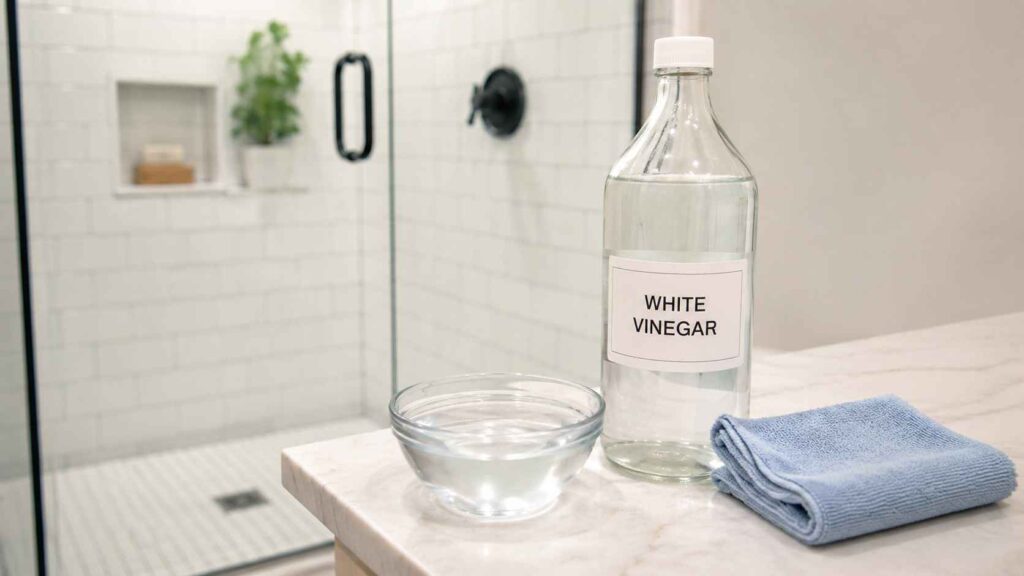
White vinegar, water and a soft cleaning cloth beside a tiled shower for gentle shower repair aftercare.

Remove Limescale From Taps and Showerheads

Diluted white vinegar can help loosen mineral and limescale build-up from compatible taps and showerheads.

Soak a paper towel in diluted vinegar and place it around the affected fixture. Leave it briefly before wiping the area with a clean microfibre cloth.

For removable showerhead parts, soak them separately so the vinegar does not drip onto the repaired perimeter seal.

Restore the Shine of Bathroom Mirrors

Mix diluted vinegar with water and apply it to a microfibre cloth. Wipe the mirror thoroughly, then dry it with a clean cloth or squeegee to prevent streaks.

Spraying the cloth instead of the mirror also helps prevent the solution from reaching nearby grout, cabinetry or sealed areas.

Reduce Soap Scum

Use a squeegee or soft microfibre cloth to remove water from the shower screen and tiles after each use.

This simple habit prevents soap residue and mineral deposits from building up, reducing the need for stronger cleaning products later.

Keep the Bathroom Ventilated

Open a window or operate the exhaust fan during and after showering.

Good ventilation helps the room dry more quickly and reduces the damp conditions that encourage mould and mildew. For further advice, read our guide to preventing shower mould growth.

Clean Little and Often

Gentle weekly cleaning is better than allowing heavy grime to accumulate.

Cleaning regularly reduces the need for aggressive scrubbing or concentrated chemical products that may affect the shower seal.

When Should You Contact Us?

Contact The Shower Repair Centre if you notice:

  • The perimeter seal lifting or cracking
  • Water pooling outside the shower
  • Recurring mould around the repaired area
  • Water entering adjoining rooms
  • Damp walls, swollen flooring or peeling paint
  • A persistent musty smell

These signs may relate to the perimeter seal, but they can also be caused by plumbing issues or building movement. Our guide to spotting a hidden shower leak explains other warning signs to look out for.

By allowing the SealRight™ epoxy to cure properly and maintaining a gentle cleaning routine, you can keep your bathroom clean while helping your leaking shower repair last.

For shower repair assistance, call 1300 888 806 or request a free quote from The Shower Repair Centre.

Frequently Asked Questions

1. How long should I wait before using my shower after a repair?

Do not use the shower for the first 48 hours after the repair. This allows the SealRight™ epoxy to cure and bond properly. Always follow any additional instructions provided by your technician.

2. What cleaning products are safe after a shower repair?

Use a mild, pH-neutral cleaner with a soft cloth or non-abrasive sponge. Avoid bleach, harsh chemicals, steel wool, and abrasive scrubbers, as these may damage the repaired area or surrounding surfaces.

3. Can I use white vinegar to clean my repaired shower?

Yes, but it should always be diluted with water. Never apply pure or undiluted vinegar directly to the repaired seal. Do not leave the solution sitting on the surface, and rinse the area with clean water afterwards.

4. How can I make my shower repair last longer?

Remove standing water after each shower, keep the bathroom well ventilated, clean the area regularly with gentle products, and inspect the perimeter seal every few months for lifting, cracking or gaps.

5. What does the SealRight™ warranty cover?

The SealRight™ epoxy seal comes with a 25-year Product Warranty on the perimeter seal of the shower. It does not cover plumbing issues, building movement, or problems unrelated to the repaired perimeter seal.

About the Author: 

Mark Studdert is the founder of The Shower Repair Centre, specialising in shower leak repairs, waterproofing, leak detection, and bathroom restorationWith over three decades of experience, he pioneered and patented the DiamoSmart® technology, helping save leaking bathrooms without tile removal in 95% of cases. 

                Fully Licensed and Insured

                WITH A COMPREHENSIVE QUALITY CONTROL PROGRAM

                Our team has quality as its central focus with two full time quality control managers ensuring we maintain the highest possible standards on each and every job. It is important to note that we are the exclusive distributors of DiamoSmart® Systems. Our technicians are fully trained and licensed operators of this waterproofing system.

                REGROUTING SHOWERS & TILES

                Australia's Most Awarded Company For Shower Regrout Repair And Tile Regrouting Services In Brisbane, Gold Coast, Sunshine Coast, Sydney, and Central Coast

                Regrouting Tiles And Regrouting Showers For Over 23 Years

                With over 23 years of experience and 70,000 showers repaired to date, we guarantee that every shower regrout repair we will do for our clients is nothing short of what we will do for ourselves. You can have complete confidence that we will deliver the highest level of shower and tile regrouting service that backs up your company standards.

                Australia's Most Awarded Shower Repairer

                Over 70,000 Showers Repaired

                25-Year Product Warranty

                24 Years In Business

                Pioneered and Patented the DiamoSmart® System

                Introduced and Uses SealRight SealRight™ & HydroBarrier Sealant

                SETTING NEW BENCHMARKS WITH OUR HIGH QUALITY REGROUTING SHOWER SERVICE

                There are many ways you can renovate your bathroom but if you’re looking for a quick and budget-friendly fix, regrouting tiles is the key.

                The DiamoSmart® System, copies of which are now used throughout the industry, was pioneered by our founder, Mark Studdert. Before its invention, Mark noticed that the old method of regrouting showers caused small but visible chips to the edges of tiles and diminished the lustre of the tiles’ edge. He designed a small diamond-tipped grouter that would eliminate these issues when regrouting bathroom tiles. Our team offers a Diamond Re-Grout Service where we strip off existing grout and replace it with a premium Epoxy grout, which is more resistant to stains, cracks, harsh weather conditions, chemicals, and climate changes than traditional grout. This makes it suitable for areas with high traffic and since it’s a waterproofing grout, it improves not only the bathroom’s aesthetics but also its functionality.

                Why Choose The Shower Repair Centre For Shower And Tile Regrouting

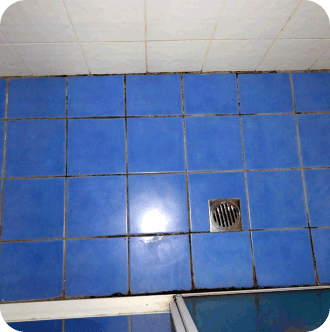
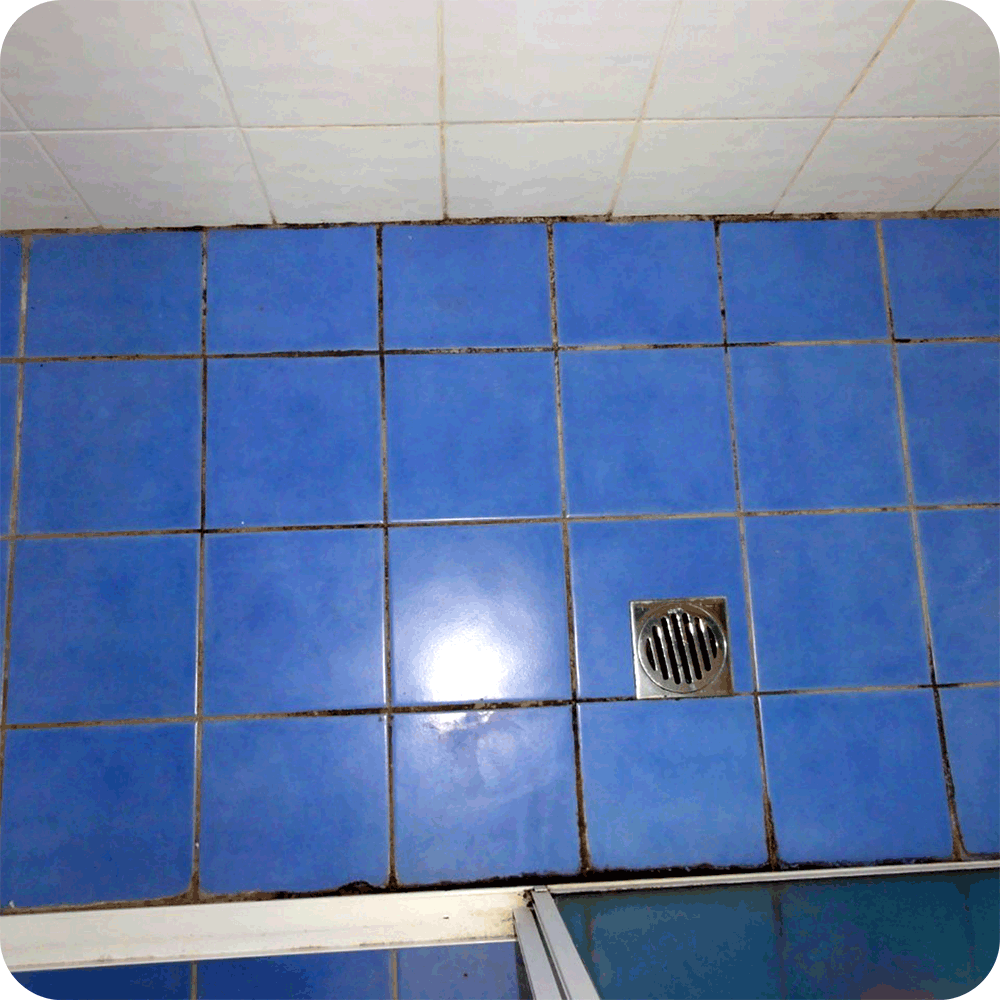
                Before Shower Repair Sydney

                BEFORE

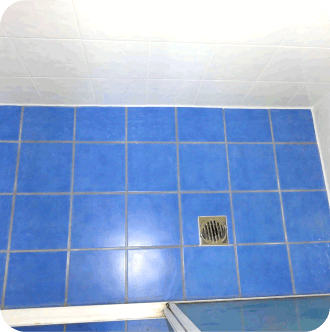
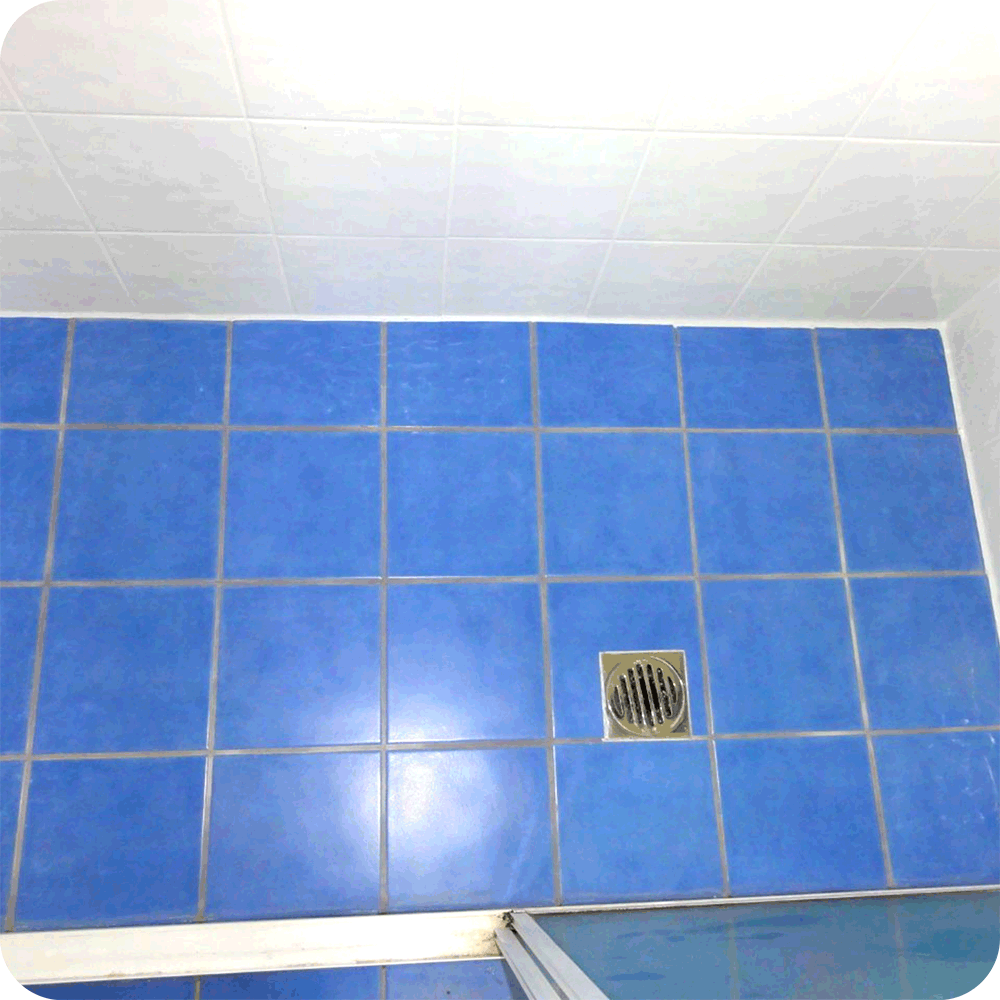
                After Shower Repair Sydney

                AFTER

                Australia’s Most Trusted Shower Repairer

                Australia’s Most Awarded Company For Shower Regrout Repair And Tile Regrouting Services In Brisbane, Gold Coast, Sunshine Coast, Sydney, and Central Coast

                FAQ’s

                The purpose of the grout is to emanate an unblemished tile appearance, while bonding the wall junctions and the floor and wall junctions – preventing wall and floor separation.

                Grout mixtures must be selected carefully to make sure that dirt and other outside elements like mould and mildew will not seep into the tiles to avoid discoloration and possible leaks.

                There are various ways in which installation can cause cracked grout in shower:

                * If mixed with too much water concentration or additives

                * If too little adhesive is used in tiles installation

                * Cement-based grout can only handle the pressure for so long if a tile pulls away from the wall after the adhesive dries

                Fact: Grouting is the weakest link in a tile installation.

                Cracked grout in shower mainly happens due to movement between two surfaces with homes inevitably moving in tiny increments because of humidity, foundation settling, and temperature.

                Even old or damaged grout can make the most beautiful looking tiles ugly and not to mention, it can cause structural damage to your home. Thus, immediate regrouting shower service is needed.

                Regrouting showers and tiles is a quick and budget-friendly fix if mould has already grown into some parts of your bathroom. We highly recommend using epoxy over cement-based when regrouting tiles because it’s stronger, more durable, and only requires light maintenance.

                At the first sign of grout damage, you must regrout shower tiles immediately. The longer showers are left with failing grout, the higher the chance that water damage is occurring to the wall behind your tile. The area of damage does not have to incur direct water spray during baths or showers to allow water seepage. Water that sits on the surface of tiles from shower spray or heavy steam will inevitably run behind the broken areas of your grout

                Before the invention of the DiamoSmart® System, the old methods of tile regrouting caused small but visible chips to the edges of tiles and diminished the lustre of the edge of the tiles. The DiamoSmart® System eliminated this issue. Our exclusive procedure for regrouting showers is listed below:

                * Remove any mouldy or deteriorated sealants such as silicon

                * Strip the existing grout out of the walls * Strip out any damaged grout from the floor area

                * Strip out grout from around the drain

                * Prepare floor and wall junctions using our DiamoSmart® system. This system uses a diamond-tipped blade for regrouting bathroom tiles, removing the sheen from the tile edge creating a small gully in wall and floor junctions.

                * Inject our SealRight sealant into the gully so it bonds the wall junctions and the floor and wall junctions – preventing wall and floor separation.

                * Regrout bathroom walls and floor using commercial grade mould retardant grout

                * Apply silicon to the internal areas of the shower screen

                * Coat the internal shower area with our hydro barrier sealant creating an invisible glove to prevent water penetration. This sealant is painted or sprayed on the wall and floor tiles, waterproofing grout surface and beneath it. This soaks in and seals anything that is porous, such as grout lines and hairline cracks.


                When regrouting showers and tiles, the type of grout matters and you should know that Epoxy grout is the most superior of all. Here’s why.

                Unlike traditional grouts, Epoxy grout is made of two-part epoxy resins which are mixed with filler powder.

                What does that mean?

                Its composition makes it:

                * Waterproof
                * Nearly 100% resistant to stains
                * Highly resistant to chemicals and physical pressure
                * Doesn’t need sealing
                * Low maintenance

                These characteristics make Epoxy grout the best for regrouting shower and bathroom tiles. Its stain, crack and chemical-resistant properties make it suitable for areas with high traffic whilst its resistance to climate changes make it ideal for locations with harsh weather conditions, excessive amounts of humidity or severe cold. What’s even more interesting is that Epoxy grout’s colour remains constant throughout. The pigment of traditional grout can diminish easily during cleaning.

                Moisture and direct water contact contribute to grout deterioration over time, and eventually, the tiles will crack. This is why you should consider regrouting shower tiles every six months. This is a quick and budget-friendly fix that can restore your bathroom’s previous glow immediately.

                You should know that you need to call in a professional to do the tile regrouting for you. Even if you possess excellent handyman skills, small mistakes can lead to extensive damage to your grout and tiles. The cost to regrout shower is expensive and if the grout is not installed correctly, moisture can seep into small holes, causing mould and mildew growth, and may cause you to call for a regrout service earlier than expected.

                Cement-based grout is actually the weakest link in tile installation because of its many drawbacks with the major being its porous nature. Its pores allow dirt and other outside elements to find their way into the grout, causing staining and allowing mould and grime to embed themselves into the grout, which requires an urgent regrouting shower service.

                The best way to prevent grout from cracking is by using Epoxy grout which is strong, durable and requires light maintenance. Whilst it costs higher than cement-based grout, it lasts much longer, negating the cost to regrout shower.