Sealing showers

Expert Bathroom Sealing In Sydney, Central Coast, Brisbane, Gold Coast, and Sunshine Coast

Need Your Shower Sealed?

We offer a highly-trained professional service for sealing showers without removing tiles with skilled and respectful technicians who work with absolute precision to deliver your project at the highest standards possible. This can save you thousands of dollars in lost rent, revenue, and unnecessary tiling repairs whilst eliminating the inconvenience of not having a shower for a week while it is being retiled.

FAST, COST-EFFECTIVE, AND EXPERT BATHROOM SEALING

The Shower Repair Centre pioneered and patented the DiamoSmart® System which took the service of sealing showers without removing tiles to a whole new level.

Our Founder, Mark Studdert pioneered the Diamond Seal Technology in 1998 for sealing showers without removing tiles. With this revolutionary technique, we help residential and commercial property owners with their sealing bathroom leaks and resealing shower challenges at faster turnaround times whilst saving thousands and reducing carbon footprint.
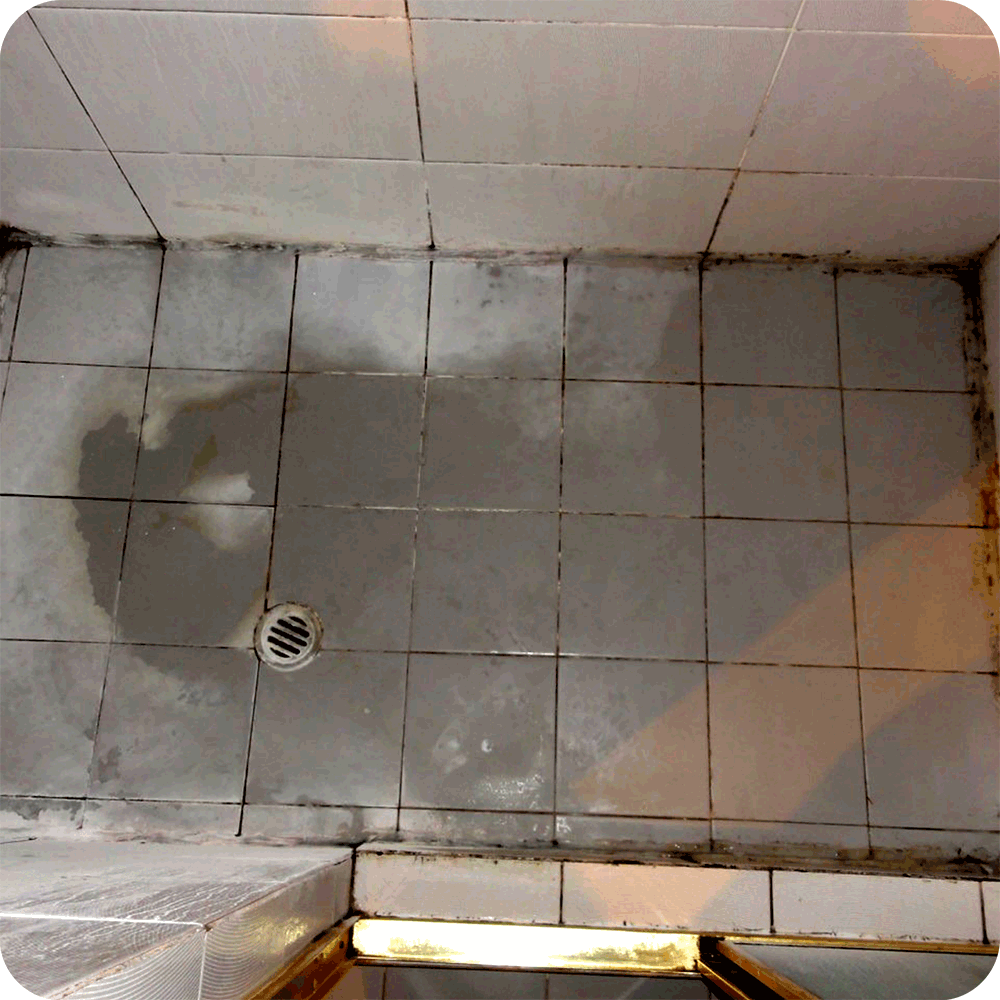
BEFORE
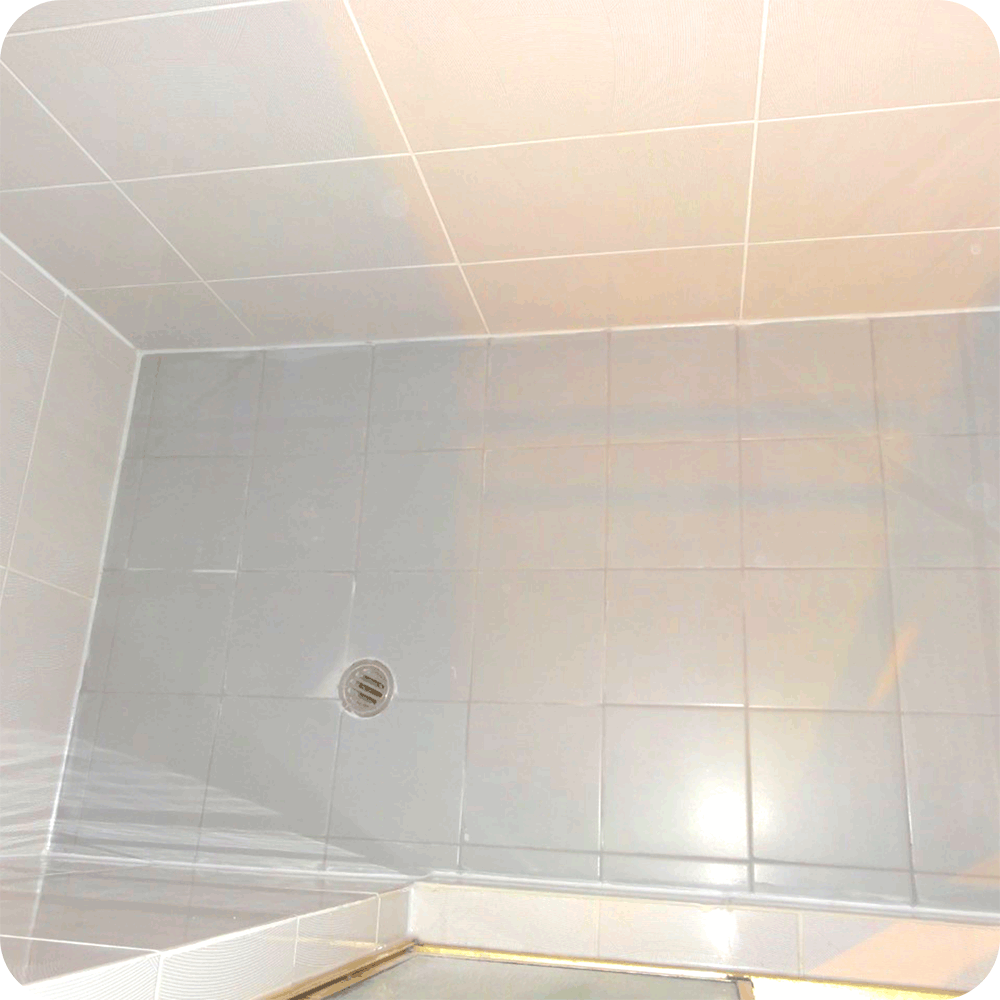
AFTER

Trusted Australian Service For Resealing Showers

FAQs

Do bathroom tiles need to be sealed?

Yes. One of the reasons why sealing bathroom tiles is necessary when doing shower repairs is because it may be the cause of your next shower leak. Bathrooms and showers are high-moisture areas, and tiles require sealing to ensure that water and dirt do not penetrate beneath the surface.

When sealing bathroom tiles, we use our SealRight™ product to guarantee more effective bonding of waterproofing agents to tiles without affecting the lustre of the sheen.

How to seal a bathroom?

Our DiamoSmart® System is designed to be fast, cost-effective, and optimal than other processes for sealing showers. Here’s what we do to keep your shower sealed:

– Remove any deteriorated shower seal such as silicon

– Strip the existing grout off the walls

– Strip out any damaged grout from the floor area

– Strip out grout from around the drain

– Prepare floor and wall junctions using our DiamoSmart® system. This system uses a diamond-tipped blade that removes the sheen from the tile edge creating a small gully in wall and floor junctions

– Inject our SealRight sealant into the gully so it bonds the wall junctions and the floor, preventing wall and floor separation

– Re-grout walls and proceed with sealing showers using commercial grade mould retardant grout

– Apply silicone to the internal areas for a complete shower screen seal

– Coat the internal shower area with our hydro barrier sealant creating an invisible glove to prevent water penetration. This sealant is painted or sprayed on the wall and floor tiles, forming a waterproof barrier beneath the surface of the grout. This soaks in and seals anything that is porous, such as grout lines and hairline cracks

How to seal a bathroom floor?

Our trained technicians follow these steps when sealing bathroom floor:

STEP 1: Our process for sealing shower floor begins with removing existing sealants from wall tiled junctions. We prepare wall/floor junctions using the DiamoSmart® system if the shower has a tiled base. If the shower has a moulded acrylic base, an alternative preparation process will apply for the bathroom sealing.

STEP 2: We will commence with sealing shower floor / wall junctions and inside the waste surrounded with SealRight™. If the shower has a moulded acrylic base, our SealRight Flex shower seal is applied.

STEP 3: Using an antifungal grade hydroponic formula, we proceed with sealing shower floor by re-grouting the walls inside the shower. This makes the grout water repellent, and reduces the effects of efflorescence, while also ensuring grout colour consistency.

N.BCement grout cannot and will not be removed from between the wall tiles as damage to the tiles will occur. Cement grout has a noticeable sandy texture. If cement grout is between your wall tiles, we will seal use our Hydro Barrier Sealant to get your shower sealed.

STEP 4: Last step in our process in sealing bathroom floor is to top up floor grout with our commercial grade polymer based floor grout.

N.B If it’s at the proper levels, this is not required, in this case we will apply our Hydro Barrier Sealant in resealing shower floor grout.

Do bathroom tiles need to be sealed?

Yes. One of the reasons why sealing bathroom tiles is necessary when doing shower repairs is because it may be the cause of your next shower leak. Bathrooms and showers are high-moisture areas, and tiles require sealing to ensure that water and dirt do not penetrate beneath the surface.

When sealing bathroom tiles, we use our SealRight™ product to guarantee more effective bonding of waterproofing agents to tiles without affecting the lustre of the sheen.

Does a bathroom tile grout need to be sealed?

Yes. Grout is a mixture of water, sand, and cement, and once it dries, it can still soak up dirt and moisture. That is why sealing bathroom grout still needs to be done after tiles are installed.

In the process of sealing showers, it’s also necessary to get the grout in the shower sealed. Resealing shower grout does not only block water and dirt, but also stops molds and mildew growth. Plus, grout in the shower sealed properly is so much easier to clean.

How to seal a bathroom?

Our DiamoSmart® System is designed to be fast, cost-effective, and optimal than other processes for sealing showers. Here’s what we do to keep your shower sealed:

– Remove any deteriorated shower seal such as silicon

– Strip the existing grout off the walls

– Strip out any damaged grout from the floor area

– Strip out grout from around the drain

– Prepare floor and wall junctions using our DiamoSmart® system. This system uses a diamond-tipped blade that removes the sheen from the tile edge creating a small gully in wall and floor junctions

– Inject our SealRight sealant into the gully so it bonds the wall junctions and the floor, preventing wall and floor separation

– Re-grout walls and proceed with sealing showers using commercial grade mould retardant grout

– Apply silicone to the internal areas for a complete shower screen seal

– Coat the internal shower area with our hydro barrier sealant creating an invisible glove to prevent water penetration. This sealant is painted or sprayed on the wall and floor tiles, forming a waterproof barrier beneath the surface of the grout. This soaks in and seals anything that is porous, such as grout lines and hairline cracks

How to seal a bathroom floor?

Our trained technicians follow these steps when sealing bathroom floor:

STEP 1: Our process for sealing shower floor begins with removing existing sealants from wall tiled junctions. We prepare wall/floor junctions using the DiamoSmart® system if the shower has a tiled base. If the shower has a moulded acrylic base, an alternative preparation process will apply for the bathroom sealing.

STEP 2: We will commence with sealing shower floor / wall junctions and inside the waste surrounded with SealRight™. If the shower has a moulded acrylic base, our SealRight Flex shower seal is applied.

STEP 3: Using an antifungal grade hydroponic formula, we proceed with sealing shower floor by re-grouting the walls inside the shower. This makes the grout water repellent, and reduces the effects of efflorescence, while also ensuring grout colour consistency.

N.BCement grout cannot and will not be removed from between the wall tiles as damage to the tiles will occur. Cement grout has a noticeable sandy texture. If cement grout is between your wall tiles, we will seal use our Hydro Barrier Sealant to get your shower sealed.

STEP 4: Last step in our process in sealing bathroom floor is to top up floor grout with our commercial grade polymer based floor grout.

N.B If it’s at the proper levels, this is not required, in this case we will apply our Hydro Barrier Sealant in resealing shower floor grout.

How to get rid of black mould on your shower sealant?

Bathroom sealing can turn mouldy if moisture penetrates into it, and that is why a watertight seal is required to prevent these from ruining your bathroom’s polished look.

Our method of sealing showers without removing tiles involves scraping out old, worn, or mouldy grout from tile junctions and applying a hydro barrier to repel water absorption. We then apply a sealant to consolidate the seal in the junctions and replace the grout as a final aesthetic component – creating an invisible glove to prevent water penetration reaching beneath the surface of the grout.

How soon after sealing grout can you use a shower?

After the process of sealing showers, there’s no need to wait for weeks just to make sure that shower seal is secured. You can use it the next day (after 24 hours) so you’re hardly inconvenienced. We are committed to giving unparalleled customer service in pursuit of excellence.